Gel Nails - For that Natural Look Whatever the Occasion


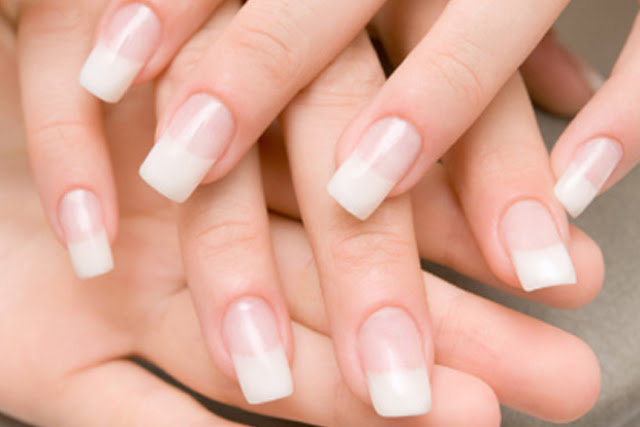
Gel nails are perhaps the most natural looking of all nail additions and are definitely worth considering if you want to have longer and stronger nails which appear to be your own. You create gel nails by applying layers of an acrylic gel to the surface of your nails. These layers then combine and set to produce a solid nail. To harden the nails, they are then normally placed under an ultraviolet light or even sometimes simply an ordinary room light.

gel nails

It can be difficult to apply gel nails yourself, although it is quite possible. It's certainly a lot simpler to get a nail specialist to do the job for you, but if you do wish to try it yourself, the following is a method for using the acrylic overlay technique.

1. Buff the natural surface of your nail using a buffer to remove the shine. Don't overdo it! Then shape the free edge of the nail plate to the correct size corresponding to your finger nail. Use a medium-grade emery board to do this.

2. Apply a drop of nail adhesive to the nail tip whilst holding it at a 45 deg angle with the tip against the outer edge of your own nail. Then slide the nail tip back and press it down when in position. Hold it in position for a few seconds until it is held securely by the adhesive.

3. Apply a single coat of acrylic bonding agent to the surface of your own nail only. Don't get it on the acrylic tip.

4. A small amount of acrylic liquid and acrylic powder should be poured into separate glass containers. Using a brush, dip it into the acrylic liquid, then press it lightly against the dish to release any excess acrylic. Then sweep the tip of the brush across the surface of the white powder until it has picked up as much of the powder as it is able to carry, and the resultant ball is big enough to cover the entire nail. Then take the brush and place te tip with the acrylic ball in the center of your nail.

5. As quickly as you can, but without rushing, commence by pushing some acrylic into the cuticle region, working towards the sides and forwards to completely fill in your nail behind the acrtlic tip.

6. When completed and dry, tap your nail gently on the infilled area using the brush handle. The familiar clicking sound will indicate that the acrylic has fully set.

7. To finish, file and buff the nails as you require. Then apply a base coat varnish, some polish and a top coat. It is also a good idea also to apply a drop of cuticle oil to the cuticle.

Note that all nail enhancements will need filling every two to four weeks, depending upon how quickly your nails grow. This means filling in the area in front of the cuticle to blend in with the existing acrylic fill.


Natural Makeup

Tips For Natural Looking Makeup

natural make-up

We've all seen women who just plaster their makeup on, looking more like a mannequin than an actual person. If you would rather have a natural beauty, you don`t need to go completely bare, it`s all in how you choose and apply your makeup. Here you`ll learn a few tips to keep your face glowing and lovely without resorting to heavy handed techniques. The trick is to keep it light and to highlight just one area of your face, your eyes or your mouth.

Coverage

When it comes to concealer and foundation, many women tend to cake it on in an attempt to hide blemishes. That tends to result in the cracked face issues that occur a little later in the day. By using the following tips, you can make your face look natural while still covering up those spots and blemishes.

- Opt for tinted moisturizer, it blends and evens out the skin while moisturizing and is so thin that it`s literally unnoticeable. 
- For heavier coverage, use concealer chosen to blend with your skin to dot over spots and then finish the face with a tinted moisturizer for a lighter look. 
- Concealers with yellow undertones tend to hide blemishes best.

Eyes

Your eyes are one of the first things people notice, so the last thing you want is for them to focus on how much makeup you`re using! 
- For long lashes, consider using clear mascara to give them volume without adding too much. 
- Use foundation lightly applied to your lids for a natural boost. This also brightens the eyes and lays an even foundation for any shadow you wish to apply. 
- Choose eye shadows that enhance your eye color, blue or green eyes look smoking with pink or brown shadows and brown eyes work well with darker plum shades. 
- When using eyeliner, stay away from black and unnatural shades. Opt for brown or charcoal grey instead and blend slightly to create a natural line.

Lips

Lips don`t have to be bright to be noticeable. If you want your mouth to stand out, but still aim to use natural looking makeup, leave your eyes simple and focus the color on your mouth.

- Avoid glittery or super glossy lipstick, which looks very made up. 
- To choose the appropriate color, bite your lips gently to see what color comes up. Match the lipstick color to this. 
- Make your color last longer with a clear lip gloss to set it. 
- For days when you want your eyes to be the focus, stick to just a transparent gloss for your lips and let your natural color shine.

Cheeks

Blush should give the impression that you`ve just jogged half a mile, with a natural glow spreading over the cheekbones. Be sure you choose the right colors and don`t overdo it, the attention should be drawn to your eyes or lips, not your cheekbones.

- Check your cheek color after a bit of exercise to choose the right blush. Alternatively, you can just pinch them to bring up the color, but this won`t tell you where the blush should be applied. 
- Apply blush in the same areas that you naturally color when exercising for a truly natural looking makeup. 
- Keep it light. You just want a dusting of color, nothing too obvious.

Natural make up lets you look your best without making it appear that you've had help. People will be impressed at how fresh your face looks. Even with a very little amount of makeup, you`ll feel beautiful and ready to face the world.


Acrylic Nails

How To Apply Artificial Acrylic Nails


Acrylic Nails

Beautiful nails are a desired enhancement to feminine beauty, but many ladies may have trouble attaining them. If nature did not bless you with wonderfully strong, healthy nails, you can still enjoy the glamorous look that long and painted nails can give you. All you have to do is apply strong and durable acrylic nails over your own nails.

You can find a service for acrylic nail application at nail salons. It is an expensive option. It is not as expensive for you to apply the acrylic nails yourself. By following instructions and with practice, you can apply your acrylic nails with the same care and great results that you can get from a nail professional.

As for supplies, you will need non-acetone nail polish remover, artificial nail tips, liquid acrylic, powdered acrylic and nail oil. Your equipment needs to include a nail brush, nail files, nail filing block, acrylic nipper, small acrylic brush and a working dish for the acrylic liquid. Choose acrylic nail tips that are the same size as your own nails or you will have to file the nails down.

Give your nails a manicure. Smooth rough edges and remove dead skin. Use a non-acetone nail polish remover to remove nail polish and acrylic. Use the filing block to roughen your nail surfaces. Cut the nails to the skin portion. Do not injure yourself. You want to prevent your nail from being broken if the acrylic nail tip is broken.

Line up your acrylic nail tips so that you can reach them easily when you are ready to put a drop of glue on the tip. The glue drop should reach from the bottom of the nail to the indentation where your nail's edge will fit in. You can remove a crooked acrylic nail by immediately soaking it in water.

Use the acrylic nippers or a large nail clipper to trim the tips to your desired length. Use the nail file to remove any rough edges and to even out the lengths of your nail tips. Use the liquid acrylic in a well-ventilated area. You will paint the liquid acrylic on to your nails so that the beds will be smooth without any bumps where the edge of the acrylic nail tips rests on your nail.

You will be dipping the acrylic brush into the liquid acrylic and then into the acrylic powder that will create a ball of thickened acrylic on your brush. Paint the acrylic onto your nail so that you can create a smooth finish for your acrylic nail tips.

Have the acrylic powder container open. Prepare the acrylic brush by dipping the brush into the liquid acrylic and then wiping it on a paper towel to remove excess liquid. Then lightly dip half of the brush into the liquid acrylic and then remove the excess by wiping against the inside of the liquid acrylic bottle.

You are ready to dip the brush tip into the acrylic powder. When you do, you will create a ball of thickened acrylic. It should be damp instead of wet. Paint this thickened acrylic where the acrylic nail tip is on your nail. Work quickly to spread the acrylic onto your nail surface without flattening the acrylic. Wipe the brush on the paper towel to remove any excess acrylic.

Continue working until you have built up the surface to resemble the curve of your own nail bed. Apply a bit at the tip of the nail to create a natural look as necessary. Avoid getting acrylic on your cuticles because mould or fungus could grow under the nail at that spot.

It will take about ten minutes for your nails to dry and set. You can safely use a grit nail file on the sides of the dried and set nails and close to the cuticle bed to shape your nails. Use the filing block to smooth your nails. Remove any acrylic filings and dust by washing with soapy water and using a brush. The exposure to the harsh chemicals requires that you moisturise your nails with nail oil. As your nails grow out, you will need to paint more acrylic on to your nails every two weeks.


How to Get Clear Skin

How to Get Clear Skin - The Secret to Clear Skin


How to Get Clear Skin

If you're looking for tips on how to get clear skin then this article will probably stand out from the rest. Unlike the other articles, I'm not going to insult your intelligence with miracle products to make a quick buck - what I've covered in this article is simply the best way to treat your acne that I have discovered after years of research.

I Suffered From Acne at a very Young Age

I started getting spots and what you would describe as mild acne at the age of 12, but little did I know then that it would progress into the much more serious case of cystic acne and that it would blight my confidence and put me at the centre of ridicule with my classmates.

Desperate to get rid of my cystic acne that was prevalent and highly noticeable on my face, chest and back I went to the local doctor at the age of 14 to get treatment. Over the course of the next 4 years I was prescribed all sorts of drugs and medication including erythromycin, tetracycline, benzoyl peroxide and even roaccacutane, but nothing worked.

I tried fasting, only eating vegetables, drinking gallons of water a day, supplementing with every single kind of vitamin I could find and I even starting putting odd mixtures such as psyllium husks on my face to help clear up my acne. Nothing worked. I decided to take matters into my own hands, did years of research on holistic remedies; I read everything I could find about the body and the root cause of spots and acne. It was only then that I started to make discoveries.

Here's what I learned - How to get clear skin

Through my extensive research, I found that acne is caused by excessive toxic buildup in the body. Toxins are poisonous, which is why your body will do all it can to remove them from the body.

In a healthy spot free person, these toxins would be excreted through the liver, kidney and bowels, however in the unlucky amongst us who suffer from spots one of two things is happening: either the level of toxicity is too high for all toxins to be removed from the body, or the organs aren't filtering the toxins to their full capacity.

If toxins can't be filtered out by the liver, kidney or bowels, then the only other way your body can remove these toxins from your system is through the skin. When that happens, pores become blocked, acne bacteria spread and spots break out.

To Get Clear Skin You Must Do The Following

Firstly, you must reduce the number of toxins that you are ingesting. It sounds easy but it is actually quite difficult because toxins can be caused through a wide variety of ways; poor diet, mercury tooth fillings, air pollution, chlorine in the swimming pool, allergic reactions, unbalanced hormone levels and even from Candida and leaky gut. The trick is to identify where the majority of your toxins are coming from and eliminate them. Some of this can be achieved through a blood test but often it requires a bit of experimentation through trial and error.

Secondly, you need to improve the filtering capacity of your internal organs. The best way to do this is to internally cleanse the kidneys, liver and intestines to remove all the stagnant bile that has built up over time. Don't underestimate the power of internal cleansing - when I did my first liver cleanse I felt incredible - my eyes glowed, my overall well being improved and my skin was so much clearer.

Everything else you read about applying substances to your face are only good for removing existing spots. Anything topical that you apply to the site of acne will not stop new spots from forming - for that you need to look deeper. If you reduce your toxicity and improve your liver, bowel and intestinal function then you'll have excellent results - I'm living and walking proof.


Simple Facial Exercises

How to De-stress Your Face Using Simple Facial Exercises

Facial Exercises

Stress shows on faces. Sometimes it can look like a frown and sometimes stress makes us look tired, drawn, mad and upset. One thing for certain, when you allow stress to continually affect your face, you are destined for down-turned mouth corners and a perpetual scowl.

If you have been asked, "Are you mad at me?" or "Did I say something that upset you?" you know that your face is blatantly wearing your emotions because your smile has turned upside down.

You can easily remedy your facial appearance with facial exercise.

Skeptical? Probably.

As you sit at your computer take notice of your face posture.

Are you allowing concentration furrows to develop between your eyebrows? Does your mouth feel slack? Do your eyebrows feel heavy?

Aging faces soften because the muscles require certain movements to keep them taut. Conversation, singing, and laughing can help release tension but unfortunately droopy features will begin to become apparent as you advance in years. Couple that with tension from life's stresses and all of a sudden your face can look misshapen.

The old adage, "your face will stay that way" can become true. How we mold and hold our faces over a span of years and years attributes to the look that causes us to despair.

There is no reason to feel hopeless about your face. We want to look our best and we want to feel sensational about ourselves but sometimes we let stress, lines and a sagging face destroy our confidence. All this can be remedied when you spend just a few minutes a day being proactive with simple exercise movements.

Working from the inside to out your face can change from old, matronly even elderly to look brighter, firmer and certainly less stressed.

How does this happen? Exercise produces oxygenated blood to the muscles, the tissues and skin. This fortifies your face with circulation that pumps up the muscles and revitalizes the shape and contour of your features. 
In addition to frown lines between the brows, a deeply lined forehead, a down turned mouth and maybe grooves, pouches, folds or jowls, and sagging muscles, facial exercise helps every area of your face and neck.

Facial exercise can help change the way you think and feel about your appearance. Using a dynamic approach produces a certain satisfaction that you are the master of your fate (face) and that you need not spend large amounts of money or endure certain risks to improve your appearance.

Using your thumbs, fingers and white cotton gloves one can easily begin to turn back the look of an aging face. Putting forth the effort works from the inside out. Learning then using isometric techniques involves anchoring, tensing and releasing the facial muscles. This action creates increased circulation so that your muscles and skin benefit from the oxygenated blood.

The stress and tension you feel and see in your face may be a career liability. So why not begin a facial exercise routine as a career investment so that stress and tension are alleviated in an all natural way. This means your face will no longer appear rigid and stiff.

The process is easy, it takes only a few minutes and in just days, you will see how the stress that plagues your face melts away. You will look healthier, happier and even younger as you retrain those tiny muscles hidden beneath your skin.


Popular Posts

Blog Archive